Made By Joel

Every once and a while, you come across a blog that makes you go: “wow”… and Made by Joel is one of them.

Created by dad and artist, Joel Henriques, the blog consists of amazing toy and craft projects that Joel creates for, and with, his four-year-old twins.

Each creative project Joel designs is documented through charming photos of his children happily interacting with the completed craft.

For parents, the blog is inspiring, not only is Joel’s love for his work modestly apparent, but his projects are ‘doable’ ,  even for the least creative of caregivers, and can be re created with Joels simple instructions and http://www.youtube.com/watch?v=y4CyNvEfWoEhttp://www.alexandalexa.com/uploads/Alex%20and%20Alexa%20Made%20by%20Joel%20Printout.jpg” target=”_blank”>printable templates.

Joel’s crafts are so clever and cute that they have been published in http://www.youtube.com/watch?v=y4CyNvEfWoEhttp://www.style.it/” target=”_blank”>Italian Vanity Fair, http://www.youtube.com/watch?v=y4CyNvEfWoEhttp://www.parents.com/” target=”_blank”>Parents Magazine and on various blogs. But what is even more exciting, is that today,  Joel http://www.youtube.com/watch?v=y4CyNvEfWoEhttp://madebyjoel.blogspot.com/2010/10/book-update.html” target=”_blank”>announced on his blog that he is having a book published ,called MADE TO PLAY Handmade Toys and Crafts for Growing Imaginations, set to be released in Fall 2011.

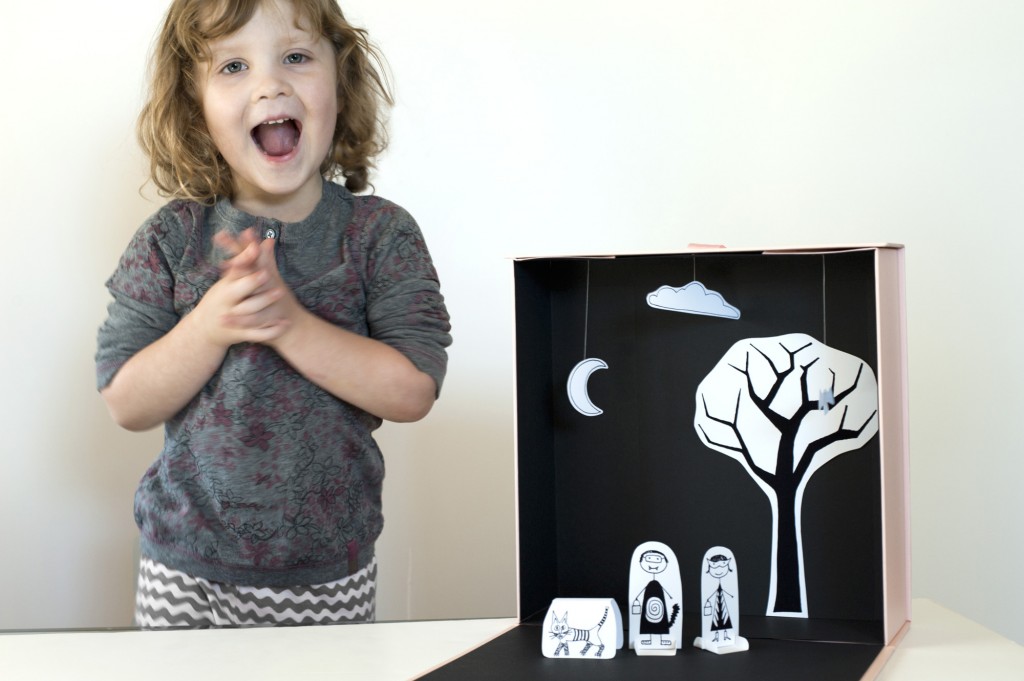
We adore Joel’s blog so much, we wanted to be a part of it, so we contacted Joel to see if he could come up with a craft that would re use the left over packaging of an http://www.youtube.com/watch?v=y4CyNvEfWoEhttp://www.alexandalexa.com” target=”_blank”>Alexandalexa.com gift box, and since we were all in a Halloween mood, Joel created this amazing Halloween themed craft:

http://www.youtube.com/watch?v=y4CyNvEfWoEhttp://madebyjoel.blogspot.com/” target=”_blank”>

The Alexandalexa.com Stringy and Spooky Halloween Box

Instructions:

1. Using the http://www.youtube.com/watch?v=y4CyNvEfWoEhttp://www.alexandalexa.com/uploads/Alex%20and%20Alexa%20Made%20by%20Joel%20Printout.jpg” target=”_blank”>printout (http://www.youtube.com/watch?v=y4CyNvEfWoEhttp://www.alexandalexa.com/uploads/Alex%20and%20Alexa%20Made%20by%20Joel%20Printout.jpg” target=”_blank”>click to see printout), or your own designs, cut out the Halloween shapes.  For the trick-or-treaters from the print, cut out the base and then cut notches on the lines and fold up the edges (see photo below).  Then set the figure into the slots on the base to stand them up.  For the cat, cut out and make two folds across the top, then stand up (see photo below)

2. You can line the box with paper, paint it, or just leave it plain.

3. Now cut some short lengths of thread and tape one end to the hanging objects, and tape the other end to the top inside of the box.

http://www.youtube.com/watch?v=y4CyNvEfWoEhttp://www.alexandalexa.com/uploads/Alex%20and%20Alexa%20Made%20by%20Joel%20Printout.jpg” target=”_blank”>

http://www.youtube.com/watch?v=y4CyNvEfWoEhttp://www.alexandalexa.com/uploads/Alex%20and%20Alexa%20Made%20by%20Joel%20Printout.jpg” target=”_blank”>print me!

4. Now it is ready to play with! You may also close the box and take your Halloween scene on the go!

Let us know what you think of Joel’s fantastic craft and send us pictures if you and your kids have a go at it to [email protected]!

Images: Joel Henriques

Posted on : October 27th, 2010 Comments : 9
Category : Crafts, Entertainment |

Back To School Craft: Pencil Toppers

With the new school term approaching, and the weather looking distinctly non-summery, the team at Alexandalexa.com have been working to find you the perfect activities to keep the little ones entertained.

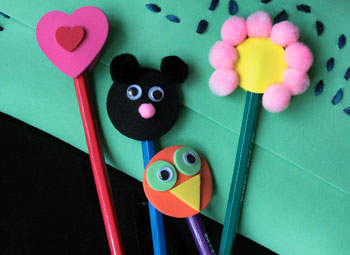
This week we have found this fantastic pencil topper craft on Kaboose.com which will keep the kiddies entertained whilst also giving them reason to look forward to the start of school. Let your little ones get their creativity flowing by creating different zoo animals, a selection of flowers or any other shape their heart desires!

What you will need-

 -sheets of coloured foam

-scissors

- glue

-pen or pencils

-any decorative extras (we recommend sets of wiggle eyes and pom-poms).


How to make them-

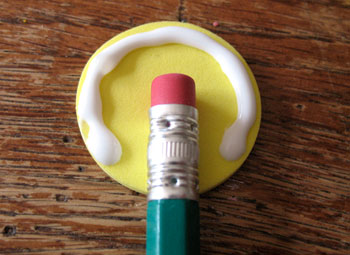
-Cut 2 identical shapes in the foam, glue around the outside of 1 of them, leaving a gap for the pencil

-Glue the 2 shapes together and leave to dry.

-Decorate the foam to create animals, objects or just pretty shapes. Using glitter, sequins, pom-poms, other pieces of foam or wiggle eyes, glue them onto the foam shape.

-Once the glue has completely dried, push the foam figures onto any pens or pencils.

-Finally take your newly decorated stationary to school and make all the other kids at school green with envy!

Posted on : August 27th, 2010 Comments : 0
Category : Crafts |

Vintage Style Friendship Bracelet Kit

You may remember the good ol’ days when your breaks from learning and weekends consisted of jumping rope, hop scotch, clapping games and exchanging friendship bracelets…nostalgic? Why not bring it all back, starting with making friendship bracelets with your little ones.

With the school year coming to an end, helping your kids make bracelets for their special friends at school can be a fun weekend activity and will make a great end of term gift.

If you don’t quite remember the technique, we found the vintage style ‘A Little Help From My Friendship Bracelet Kit’, complete with bright embroidery thread, alphabet beads, coloured beads, and elastic thread….just like when you were small.

Posted on : July 15th, 2010 Comments : 1
Category : Crafts |

Homemade Bird Feeder

Make bird watching a whole lot easier by inviting the birdies to dine in your own back garden with this homemade bird feeder.

What You Will Need

Clean 1-liter soda bottle

Craft knife

2 wooden spoons

Small eye screw

Length of twine for hanging

What You Will Need

1. Draw a ½ inch asterisk on the side of a 1-litre soda bottle about 4 inches from the top.

2. Rotate the bottle 90 degrees and draw another asterisk.

3. Two inches from the bottom, draw a 1-inch-wide circle opposite each asterisk.

4. Parents Job now, sse a craft knife to slit the asterisk lines and cut out the circles.

5. Insert a wooden spoon handle first through each hole and then through the opposite asterisk.

5. Remove the bottle cap and twist a small eye screw into the top of it for hanging.

6. Finally, fill your feeder with birdseed, recap it, and use a length of twine to hang it from a tree

Posted on : April 23rd, 2010 Comments : 0
Category : Crafts |

Button Flower Craft

Bring spring in a bit early with these livened up house plants that feature vibrant button flowers!

What You Will Need

- Green florists’ wire

- Colourful buttons

What to Do

1. Thread an 8-inch length of florists’ wire up through a stack of buttons, and then back down.

2. Twist the wire just below the stack to secure it, then insert into your plant’s soil.

Posted on : April 16th, 2010 Comments : 0
Category : Crafts |

Cute Easter Craft

Fun little craft for you and the kids that doesn’t take long to set up or do!

What You Will Need

Egg carton (paper-based works best with paint)

Acrylic paint

Paintbrush

Tacky glue

Colored feathers

Small, black seed beads

Eggs (you can boil them then decorate or pre-drain them then decorate)

What To Do

1. For each egg holder, cut a cup from the egg carton.

2. Paint the cup inside and out.

3. Let it dry, and then paint the beak.

4. Glue on the tail feathers and bead eyes and put the painted egg in the cup

Posted on : April 2nd, 2010 Comments : 0
Category : Crafts |

Easter Wreath

Having a wreath on your door, shouldn’t only be for the Christmas Holidays, it should be for ALL holidays, including Easter.

Creating a themed or un-themed wreath as a craft for the whole family to do together is a great form of entertainment and bonding.

What You Will Need

14 plastic pull-apart eggs

Puffy Paint

Egg cartons

2 large heavy-duty paper plates

Scissors

Glue

Green craft foam

Twist ties

What To Do

1. decorate the 14 plastic pull-apart eggs with puffy paint and let them dry.

2. Cut the rims from the paper plates and glue them together. Glue green craft foam leaves around the ring, leaving 1 1/2 inches between them.

3. To attach the eggs, tightly wrap twist ties (one for each egg) between the leaves around the paper plate ring, then simply close the egg halves together over the ties.

Posted on : March 26th, 2010 Comments : 0
Category : Crafts |

Shamrock Potato Stamp Craft


If you can’t make it to Ireland but still want to celebrate St. Patrick’s Day with the kids this evening, make a statement with a festive home made stamp. Perfect for making St. Patrick’s Day cards or wall pictures!

This quick and easy craft is perfect for kids of all ages and they can add on their own drawings or paintings after.

What You Will Need

potato

utility knife

paper

green plant

paint brush

plastic plate

What To Do

1. Before you get the kids settled in, take a potato and cut it in half.

2. Take a utility knife and cut a triangle, about ¼ of an inch down, out of one of the halves.

3. Round off the top of the triangle to create a heart shape and then cut a line down the middle.

4. Repeat as many times needed so that each of your kids has their own potato half

5. Let the kids paint the heart green.

6.  Have the kids press the stamp into the paper; this will create one of the shamrock leaves.

7. Show younger ones how to turn the leaf and stamp down again to create a second leaf.

8. Repeat a third time to create the third leaf.

9. Take your paintbrush, and with green paint, paint on a stem.

Posted on : March 17th, 2010 Comments : 1
Category : Crafts |

Crafty Book for Mum

Show mum how much you appreciate all the things she does for you with this creative and colourful book.

What You Will Need

Materials

Blank notebook

Crayons or markers

Scissors

Magazine clippings

Glue

What To Do

1. Decorate a blank notebook with the letters of the alphabet.

2. Pick one attribute about your mother that starts with that letter of the alphabet. For example, for the letter C there could be a picture of a cookie because she makes the best cookies. Use magazine clippings, drawings or pictures to decorate!

Posted on : March 12th, 2010 Comments : 0
Category : Crafts |

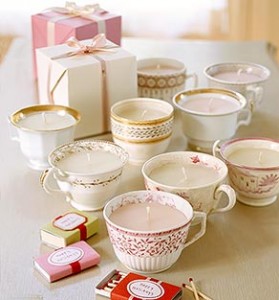
Wonderland Teacup Candle Craft


In Lewis Carroll’s classic “Alice in Wonderland,” the tea party scenes are perhaps the most memorable;

the nonsense conversations, silly characters and, of course, ‘the very happy un-birthday’ song.

This fun craft will bring you back to that Wonderland scene and also doubles as a great mother’s day gift as it is

100% eco friendly, pretty and ia useful nostalgic decoration!

If you don’t have china cups you want to recycle, thrift stores or second hand stores often have a wide variety of china

for very reasonable prices.

What You Will Need:


Paraffin Wax or Gel Wax

Double Boiler/ Coffee Can/ Large Pan

Tea Cup & Saucer

Hot Glue Gun

Wick

Chop Stick or Pencil

Oven Mitts or Potholders

What to do:


1. Melt wax or old candle stubs in a double boiler or coffee can in a pan of water.

2. Place wick into cup and cut to length, allowing for 1-2 inch for tying around a stick.

3. Insert wick into wick holder and crimp to hold.

4. Place wick into center cup and hold with a stick across width of cup to hold the wick in place.

5. Pour melted wax into cup (keep the kids away while wearing oven mitts or potholders to prevent burns)

6. Make sure wick is still centerd, adjust if necessary, and allow wax to cool

7. Trim wick

Posted on : February 26th, 2010 Comments : 0
Category : Crafts |